

First, I must apologize for a lack of pictures. Our camera battery died as I was trying to get a picture of the outside of the restaurant. *Sigh* Oh well, use your imagination and you'll be fine!
The Burger Joint, on Main Street in Milford, Michigan, is awesome! It's a small place where you order at the counter and then wait for your number to be called. Their meat is ground locally just for them and their fries are hand cut. At our table, we ordered a salmon burger (a special for Lent), a kid's cheeseburger, a Joey burger, and a custom burger with garlic aioli, bleu cheese and burnt onions. Every sandwich was delicious and perfectly made. The fries and coleslaw were also wonderful. We were there in the middle of the afternoon on a Saturday and there was a pretty steady trickle of customers, but we only waited about 10 minutes for our freshly made food.
All-in-all The Burger Joint was a great place for a quick, casual meal and I will definitely go back!
March 31, 2011

March 30, 2011
The Road to Financial Independence: Selling Online
One of the most popular ways to work for yourself these days is to set up an online store, but which site is the best for you? I've used several, but I'm just going to give you a quick run down of three biggies.


eBay has been a popular auction site for a long time. Some people have great luck selling on eBay, but it depends greatly on what you are selling and your customer base. Many people visit the site looking for something for nothing and, sadly, many sellers are willing to give it to them just to get the sale. There are also a lot of fees involved. Be sure to read and understand all the fine print before you start listing. You want to make sure you can sell your goods at a fair price and cover your costs for listing. If you're going to be selling a large number of items, you may want to look into opening a store front. You'll pay a monthly fee and get discounted rates on the other fees that eBay charges.
 Etsyis a site that specializes in handmade and vintage items. On Etsy, you will pay a fee every time you list (or re-list) an item and you will pay a final value fee when you sell an item. It's fee structure that is very similar to eBay's. Etsy gets a lot of traffic. And I do mean a lot. However, it can be hard to be seen here. You will need to spend as much time promoting your store as you will spend creating things to put in it before you will see much traffic to your specific store. If you're lucky enough to snag a feature, you'll probably get very busy. If you don't (and with thousands and thousands of stores you probably won't), you'll have your work cut out for you.
 Artfire is the new kid on the block. It is also dedicated to handmade and vintage, and also features fine art and design. Artfire has several options for your account (your "studio"). You can set up a basic account for free. You will be able to list an unlimited number of items, but you don't have access to all the seller tools that a paid account does. There will also be ads on your studio pages. If you're brand new to online selling and don't want to invest a bundle this is the way to go. You can also get a "pro" studio. With this category, you will pay a monthly fee. No listing fees and no final value fees. If you're a serious seller with a lot of inventory to list, I highly recommend this option. Artfire also offers the most tools to their pro sellers of all the sites. You will need to spend some serious time promoting your studio here, too, but Artfire's search functions differently than Etsy's, making results a bit more random. Which, in turn, makes it a bit easier to be found in the crowd.
Of course, there are lots of other options out there. There are other auction and storefront sites on the internet. There is also the option of having your own website with a shopping function. You really have to do some research to see what will work best for your situation. This is just a brief synopsis to help get you started. Good luck!
**Full disclosure: I've had a store on all three sites. Currently, I only use Artfire as it has come to be my favorite and the most economical for me.**
March 29, 2011
Tuesday Tips and Tidbits: Kitchen Science
I'm always searching for cool activities to do with my son to keep him interested in science, and learning in general. While playing around the interwebs, I found a video at Downstream Parenting illustrating how to make "Marbled Milk". It also provided a link to the book where she found the project. I can't wait to get the book and to try this with my little guy! Take a look at the video. It's so simple, but very cool!
March 28, 2011
Baby Biscuits

Who doesn't love a biscuit? They're soft and fluffy, a perfect vehicle for sweet or savory. For some reason, I decided to make some little mini-biscuits the other day as I was making biscuits for ham and beans. It's nothing revolutionary, just something I hadn't thought of before. Take your favorite cut out biscuit recipe (I used the one below from the Super Suppers Cookbook) and just use a small round cutter. I used a Tupperware midget, but a shot glass would be perfect as well. You might need to watch them pretty closely, but I baked them for about 2/3 of the time called for and they turned out very yummy!

Angel Biscuits
Ingredients:
- 5 cups flour
- 3 tsps baking powder
- 1/4 cup sugar
- 1 tsp baking soda
- 1 tsp salt
- 3/4 cup butter, softened
- 1 envelope dry yeast
- 1/4 cup warm water
- 2 cups buttermilk
- flour for rolling
- 1/2 cup butter, melted and cooled
Directions:
- Preheat oven to 375°. Grease a 9x13-inch baking dish.
- In a large bowl, combine flour, baking powder, sugar, baking soda, and salt. Cut in butter with pastry blender or two forks until mixture resembles coarse crumbs.
- In a small bowl, dissolve yeast in warm water. Add buttermilk.
- Add to flour mixture. Stir until flour is just moistened.
- Pat or lightly roll to 1/2-inch thick on a floured surface. Cut into desired size, rerolling scraps as necessary. Dip each biscuit in melted butter (I just brushed the tops with butter, rather than dipping the whole biscuit) and place in prepared baking dish. Bake 12 to 15 minutes (for minis, I baked about 10 minutes) or until golden brown.

March 26, 2011


March 25, 2011
Building a Stronger Community: Giving Back
Someone invariably asks me why I do the Breast Cancer 3-Day every year. After all, when I started in 2002, I knew very few friends or family that had ever had breast cancer. (Although, tragically, the number of friends with the disease grows every year.) I think that's beside the point. Why wouldn't I help raise money and awareness for breast cancer? EVERYONE has breasts (yes, men have to worry about it too). This event not only helps fund research for better treatments (and hopefully, someday, a cure), but it also helps to fund programs that assist underserved men and women in getting testing and medical attention.
The 3-Day has become a very special event for me. Now that I participate, I have many friends who are survivors or are fighting at this very moment. And even if I didn't know a single person who had been affected in some way by breast cancer, wouldn't it be enough to want to do something positive? Wouldn't it be enough to want to contribute to something larger than one's self? Wouldn't it be enough to want to be a part of something so optimistic in our highly cynical world? I think it is and that is why I participate in the Breast Cancer 3-Day.
How you choose to give back is entirely up to you. It doesn't have to be a physical event. You could volunteer at a nursing home, hospital or school. You could volunteer at one of the physical events. You could donate money to a cause that is close to your heart. You could simply offer a kind word and a granola bar to the homeless man you pass every day on the way to work. Even children can get involved. My son has three piggy banks and one is his "Donate" bank. He gets to decide what gets done with that money. His favorite is adopting a child around Christmas time.
Every gesture, big or small, makes a difference to someone. And, I think you'll be amazed at how much you gain by giving.
March 24, 2011
Sourdough 101: The Starter
Sourdough starter is a beautiful thing. You can use it as a base for bread, pancakes, pizza dough, biscuits... It's simple to make and needs minimal maintenance to last just about forever. Now, many hardcore traditionalists would consider my version a cheat, since I use yeast in the starter and don't just let it ferment on its own via the yeastie beasties that float around in the air. However, I find this version to be fairly foolproof and, while I do love experimentation, I'm a huge fan of things that work without any heartache.
Sourdough Starter
Ingredients:

Keeping your starter:
Sourdough Starter
Ingredients:
- 1 package (1/4 ounce) active dry yeast
- 2 cups warm water
- 2 cups all-purpose flour
- In a non-metallic bowl, dissolve yeast in warm water; let stand 5 minutes.
- Add flour; stir until smooth.
- Cover loosely.
- Let stand in a warm place for 48 hours; stirring several times a day. (The mixture will get all bubbly, smell yeasty-a bit like beer-and a liquid will rise to the top. These are all good things.)
- Use the starter or keep in the refrigerator. Before you use your starter bring it to room temperature. The longer you leave it out before you use it, the stronger the "tang" in the final product will be.
- Whenever you use some of your starter, replenish it with equal amounts of flour and warm water. (For instance, if you use 1 cup of starter, replenish with 1 cup water and 1 cup flour.)
- If, after 2 weeks, you haven't used any, remove half of the starter and replenish with the flour and water.
- If it ever develops mold or a bad smell, discard and start over after sterilizing the storage container.
March 23, 2011
S'more Pizza
It was pizza night at the Living from Scratch house and, after our individual caprese pizzas, we wanted a little dessert. I had one more ball of the dough I made using my sourdough starter and this recipe. I spread a little nutella on it (chocolate chips would work just as well) then topped it off with marshmallows that I cut into thirds and some crushed graham crackers. I popped it back in the oven until the marshmallows were nicely browned and puffy. It was quick, easy and oh so yummy!


March 22, 2011
Tuesday Tips and Tidbits: Famous Michiganders
Hey Losties, did you know that our favorite hero/villian was born and raised right here in the mitten? He even attended my alma mater, Central Michigan University, for a time!

I know, it doesn't really have anything to do with living simply, but it's pretty fun to see who shares a background with you!
I know, it doesn't really have anything to do with living simply, but it's pretty fun to see who shares a background with you!
March 21, 2011
Pretty Little Containers
So, I always have an abundance of empty containers lying around. I always think I'm going to do some wonderfully creative and amazing project with them. This time, I actually did! Crazy, I know. I made them into donation jars for some of my breast cancer 3-Day fundraising, but you could use them for storage or even as gift wrap.


Just get yourself some scrapbooking paper that strikes your fancy (or fabric or wrapping paper or an especially fun paper bag). Cut it to fit and glue it on your chosen container. Oatmeal or baby formula cans work really well, but you could use just about any container you have. It's super simple and the possibilities are endless! I'm especially excited to try using some of them as gift boxes.
**Posted at Skip to My Lou Made by You Monday**
March 20, 2011
Welcome Back, Spring!

Happy spring! And, no, this is not in my yard. My yard is brown and muddy. We have snow in the forecast for next week. Spring always takes a bit longer to stick around here in the mitten!
March 19, 2011
Remember When I Said I Would Be Online Less?
Well, as you may have noticed, I started a Facebook Page for the blog. I know, I know...I'm supposed to be unplugging, but sometimes I have little tidbits I feel like sharing. Said tidbits do not always warrant a full blog post, so I will add them to the Facebook Page. Come join me over there! You can use this link or you can use the link in the button over on the right side of the blog.
March 18, 2011
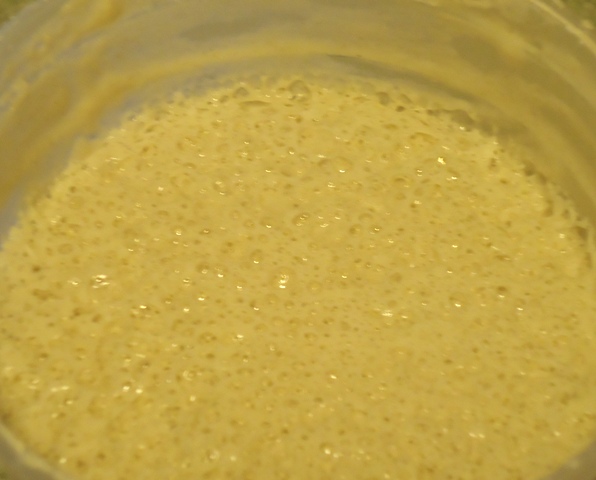
Irish Soda Bread
I know that St. Patrick's Day was yesterday, but this bread is yummy any time of the year. A slice for breakfast is simply divine! There are a gazillion recipes out there on the interwebs, all claiming to be from someone's Irish nanny, just pick one and you'll probably do just fine. Here's the one I used; my Nanny's not Irish, but the bread was good anyway!

**Yes, I know that, traditionally, this bread does not have fruit in it. But, I like it with fruit. So, I added it. I'm crazy like that.**
Irish Soda Bread
Serves 8
Ingredients:
Give this bread a try some time. With no rising or kneading, it's a cinch for every baker!

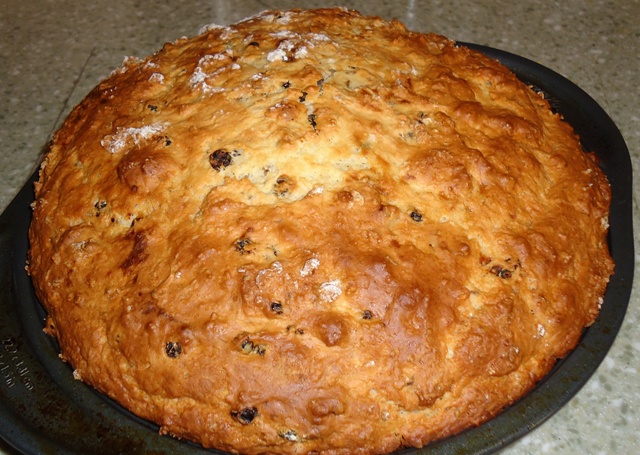
**Yes, I know that, traditionally, this bread does not have fruit in it. But, I like it with fruit. So, I added it. I'm crazy like that.**
Irish Soda Bread
Serves 8
Ingredients:
- 4 cups flour
- 1/2 cup sugar
- 2 tsps baking powder
- 1 tsp baking soda
- 3/4 tsp salt
- 1 cup whiskey-soaked currants (substitute raisins if you'd like)**
- 2 tsps caraway seeds
- 2 eggs, lightly beaten
- 1 1/4 cup buttermilk
- 1 cup sour cream (I was running low, so I used 1/2 sour cream and 1/2 plain yogurt)
- Heat oven to 350°. Grease a 9 inch baking pan or cast iron skillet.
- In a large bowl, mix flour, sugar, baking powder, baking soda, salt, currants and caraway seeds.
- In a medium bowl, mix eggs, buttermilk and sour cream.
- Add wet ingredients to dry ingredients and mix only until moistened.
- Put batter in prepared baking pan, pat down and score with a deep 'X'.
- Bake for 65-75 minutes until firm and golden brown.
- Let cool and remove from pan. Completely cool before serving.
Give this bread a try some time. With no rising or kneading, it's a cinch for every baker!
March 17, 2011
Mischevious Leprechauns
On Wednesday, at both preschool and gymnastics, my son reported that Leprechauns were causing some trouble. I had to explain how sneaky and mischevious the little guys can be. Before bed on Wednesday night we left this hat and some "treasure" (green construction paper that my son cut up) in my son's bedroom to see if we might be able to see a Leprechaun in action.

Wouldn't you know it, my son fell asleep and missed whoever made this mess in the night.

Oh well, maybe next year!
Happy Saint Patrick's Day!

This account comes from Kaboose.com.
Who Was Saint Patrick?
Even though Saint Patrick the patron saint of Ireland and one of the most celebrated religious figures around the world, the factual information about his life and times is quite vague. Most information about St. Patrick has been twisted, embellished, or simply made up over centuries by storytellers, causing much ambiguity about the real life of St. Patrick. However, there are a some elements of his story about which most scholars accept to be true.
According to Coilin Owens, Irish literature expert and Professor Emeritus of English at George Mason University, Saint Patrick is traditionally thought to have lived "between 432-461 A.D., but more recent scholarship moves the dates up a bit." At the age of sixteen he was kidnapped from his native land of the Roman British Isles by a band pirates, and sold into slavery in Ireland. Saint Patrick worked as a shepherd and turned to religion for solace. After six years of slavery he escaped to the Irish coast and fled home to Britain.
While back in his homeland, Patrick decided to become a priest and then decided to return to Ireland after dreaming that the voices of the Irish people were calling him to convert them to Christianity.
After studying and preparing for several years, Patrick traveled back to Ireland as a Christian missionary. Although there were already some Christians living in Ireland, St. Patrick was able to bring upon a massive religious shift to Christianity by converting people of power. Says Prof. Owens, "[St. Patrick] is credited with converting the nobles; who set an example which the people followed."
But Patrick's desire to spread of Christianity was not met without mighty opposition. Prof. Owens explains, "Patrick ran into trouble with the local pagan priesthood, the druids: and there are many stories about his arguments with them as well as his survival of plots against them." He laid the groundwork for the establishment of hundreds of monasteries and churches that eventually popped up across the Irish country to promote Christianity.
Saint Patrick is also credited with bringing written word to Ireland through the promotion of the study of legal texts and the Bible, says Prof. Owens. Previous to Patrick, storytelling and history were reliant on memory and orally passing down stories.
Patrick's mission in Ireland is said to have lasted for thirty years. It is believe he died in the 5th century on March 17, which is the day St. Patrick's Day is commemorated each year.
The first year St. Patrick's Day was celebrated in America in 1737 in Boston, Massachusetts. The first official St. Patrick's Day parade was held in New York City in 1766. As the saying goes, on this day "everybody is Irish!" Over 100 U.S. cities now hold Saint Patrick's Day parades.
Are you doing anything special today? I plan on trying my hand at corned beef and cabbage. My son and I also hid a leprechaun hat and some treasure for the leprechauns to find. I'll let you know later if we saw any!
March 16, 2011
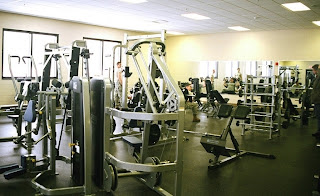
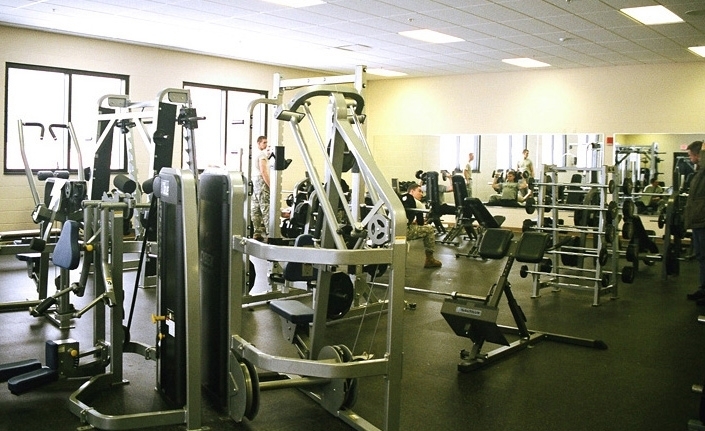
Workin' it Out
Exercise. Working out. Getting in shape. They all conjure images of sweaty people staring at TVs while running on a vast row of treadmills. I have to admit that it does not appeal to me. I've been a member of a couple different fitness centers, and I do well when I have a work out partner to keep me company. When I have to go by myself, I don't. I find gyms incredibly boring. Plus, they're expensive. I know I'm frugal, but paying to be bored just seems wrong no matter how you look at it. If you're good about going regularly, then it's a-ok. Pay the money and do your thing. You're stronger than I am. However, there are other ways to get in shape that are more fun and free (or nearly free).
Go for a walk. Walking around a cute neighborhood or on some favorite nature trails is a fine way to shape up. If you're ambitious, go for a run-but take care of your knees!
Take advantage of natural exercise. My food mill takes more muscle than a food processor. Same goes for mixing by hand instead of pulling out my electric mixer. Heck, even basic cleaning jobs will burn some calories for you. Soon, I will be working on my gardening and landscaping-plenty of exercise there! As I learn to do more for myself, I discover more and more ways to get in a little exercise every day.
The possibilities are really endless. Join a community sports group. Play on the playground with the kids. Run around with your dog at a dog park. Be creative and you'll find that you're getting in better shape without even realizing it!
Go for a walk. Walking around a cute neighborhood or on some favorite nature trails is a fine way to shape up. If you're ambitious, go for a run-but take care of your knees!
Go for a ride. Riding a bike around the same places that you like to walk is good too. I actually won a new bike not so long ago, but haven't used it much. I plan to change that this summer.
Take advantage of natural exercise. My food mill takes more muscle than a food processor. Same goes for mixing by hand instead of pulling out my electric mixer. Heck, even basic cleaning jobs will burn some calories for you. Soon, I will be working on my gardening and landscaping-plenty of exercise there! As I learn to do more for myself, I discover more and more ways to get in a little exercise every day.
The possibilities are really endless. Join a community sports group. Play on the playground with the kids. Run around with your dog at a dog park. Be creative and you'll find that you're getting in better shape without even realizing it!
March 15, 2011
Shortcuts!
I've had several people comment to me that they just don't have the time to cook from scratch every night. I can respect that. I was once a full time researcher along with being a mom and wife. When you add in any significant commuting time, the thought of cooking up a whole meal is draining, at best. So here are a few ideas for those that would like to eat from scratch more often, but don't always have the time.
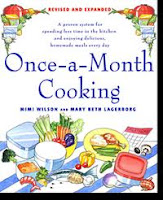 Once a month cooking or OAMC-There are multiple websites dedicated to the art of cooking enough food for one month all in one day, or weekend, and then freezing it for later use. I utilized a few of these recipes when I was pregnant with my infant son. I wanted to have meals in the freezer and ready to go for those newborn days. Some of the recipes are really pretty good. Just be sure to keep the cooking directions some where handy. Nothing is more frustrating than forgetting to save them and then having to do all the searching all over again before you can cook your dish. I mean, I would think it would be frustrating. I, myself, would never do something like that. At least, that's my story and you can't prove otherwise.
 Dream Dinners, Supper Thyme, etc- This is the same concept as OAMC, except you go assemble your dinners at a commercial kitchen establishment. I've done this before and the food was good, reasonably priced and pretty much "from scratch". This is more expensive than doing it all yourself, but they do the shopping and the clean up! Plus, most places will provide snacks and drinks while you work. Some places will let you book a group and then it's just like cooking with all your friends, except that you don't have to shop or clean up! Did I mention how nice it is to not have to shop or clean-up?
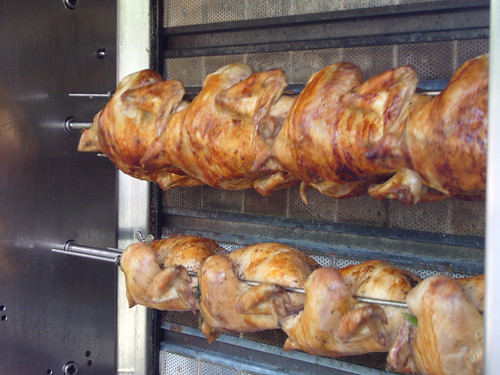 Supermarket Shortcuts- These are shortcuts that enable you to make the primary dish without some of the prep work. For instance, many grocery stores sell rotisserie chickens for $4-$6. Recently, I bought one and shredded the meat. I got enough meat to make four different dishes. Shredding the chicken only took a few minutes and it saved me cooking chicken for each of those four nights. Many stores offer vegetables and fruit that's already been cut up or a wide variety of hot and cold side dishes. Take advantage of these. Again, they may be a bit more expensive than doing it all yourself, but if it's time that you're trying to save than this is a great way to do it.
Now, you'll notice I don't recommend any of the frozen meal options that are available. That's not to say I've never used them, because I have, but most of them are loaded with salt, sugar and artificial ingredients. Also, some of them just don't taste very good. If you're a label reader, check them out. If you're comfortable with the nutrition info and ingredient list, then go for it. I have found, though, that for their price and flavor they're just not worth it for us.
I hope that one of these is helpful for any of you that would like a little more scratch cooking without all the extra time!
March 14, 2011
Pi Day Pie!
Here she is! Oatmeal-Almond Pie. Isn't she a beauty? She is quite tasty, too. How do I know already? Well, I may have sampled devoured the piece I took the picture of. But, hey, I hadn't eaten much of anything today and it has oatmeal in it...healthy...It's got a hearty texture and a sweet, simple flavor.
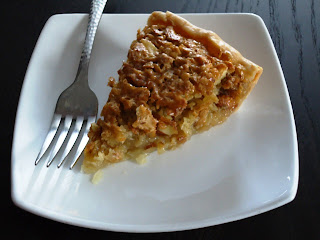
I got the recipe from Grit Magazine. Here it is with a few notes.
Oatmeal-Almond Pie
Serves 10
Ingredients:

I got the recipe from Grit Magazine. Here it is with a few notes.
Oatmeal-Almond Pie
Serves 10
Ingredients:
- pastry for a single crust pie (I took a little help here and used a store-bought crust. Spur of the moment pies don't always get home made crusts.)
- 1 cup old-fashioned (not quick cooking) oats
- 1/2 cup sliced almonds (I only had whole, so I chopped them up and used them.)
- 2 eggs
- 2/3 cup melted butter
- 2/3 cup light corn syrup
- 1/2 cup sugar
- 1/2 tsp vanilla
- pinch of salt
- Heat oven to 350˚F. Adjust pastry in pie pan and flute edges.
- Using electric mixer (I just used a whisk. Dirtying the mixer is not necessary.), combine remaining ingredients (Let the butter cool a bit before you add it to avoid cooking the eggs.) until well-blended. Pour into pie shell.
- Bake for about 45 minutes, or until filling is set.
- Cool completely before cutting.
Pi/Pie
Today is March 14th or 3/14 or, in some countries, 3.14. However you slice it (get it? slice...) it's Pi Day! In honor of pi I think I will make some pie. I'm not sure what kind yet. Maybe something chocolatey and comforting. I will post the kind and recipe later today (bonus posts, what?). Meanwhile, go find yourself some yummy pie for lunch or just do some geometry!

March 13, 2011
Did You Spring Ahead?
Don't forget that daylight savings time began this morning! If you haven't "sprung forward" yet, do it now!

March 12, 2011
A Word About Preparedness
I'm sure most of us have spent some time watching the footage of the devastating Japanese earthquake and tsunamis over the past couple of days. It's a terrible tragedy and, being a natural disaster, completely unavoidable. The only defense we have against these sorts of events is our readiness. People living in earthquake-prone areas (or areas prone to any sort of dangerous natural phenomena) do the best they can to design buildings to withstand whatever may get thrown their way, and that's a great start. Our Earth, however, always has the power to throw a curve ball. Did you know earthquakes happen all over the world every day? Check out the United States Geological Survey; you might be surprised at where some of the recent quakes have occurred. Obviously, there are many other examples: hurricanes, tornadoes, volcanic eruptions, etc, of events that could seriously affect someone's life.
Some people believe that being prepared for bad times means that you're pessimistic or paranoid. I don't believe I'm either of those things. However, I want to make sure that my family has the things they need in an emergency. There are folks that believe in extreme preparedness. To them, my own version of preparedness is woefully inadequate, but I think we have enough to get through a short to medium length interruption of services. Remember, that when an emergency happens, everyone will be trying to obtain basic necessities. Lines to buy water and canned goods in Hawaii were hours long once the tsunami sirens began going off, according to MSNBC.com. A bit of planning along with a little space, and you can avoid those lines when an emergency hits your area.

Here's a brief list of some of the things that I make sure to keep in my house, just in case:
Some people believe that being prepared for bad times means that you're pessimistic or paranoid. I don't believe I'm either of those things. However, I want to make sure that my family has the things they need in an emergency. There are folks that believe in extreme preparedness. To them, my own version of preparedness is woefully inadequate, but I think we have enough to get through a short to medium length interruption of services. Remember, that when an emergency happens, everyone will be trying to obtain basic necessities. Lines to buy water and canned goods in Hawaii were hours long once the tsunami sirens began going off, according to MSNBC.com. A bit of planning along with a little space, and you can avoid those lines when an emergency hits your area.
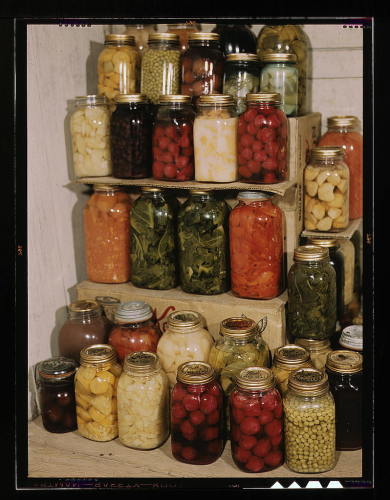
- flashlights-several, within easy reach in various rooms, kept in working order
- extra batteries
- candles/oil lamps- The oil lamps are some very cool antiques that can come in handy if power is lost for a long period of time.
- an emergency light/radio- Ours is from Black and Decker.
- basic first aid supplies- rotating anything that might expire
- pantry of food- I would have this anyway, I use it extensively for cooking and meal planning, but I do make sure to keep some items that don't require cooking.
- alternate cooking sources- anyone with a BBQ grill has one!
- drinking water- I generally don't buy plastic bottles of water; this is the exception. I rotate it periodically. The fish tank often gets a super-cleaning on days coinciding with the rotation.
March 11, 2011
Cookbook Review: Mark Bittman's Kitchen Express
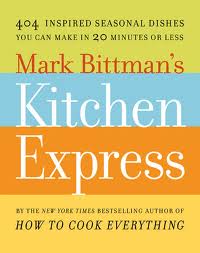
Mark Bittman is the author of How to Cook Everything and Food Matters (which I highly recommend). His Kitchen Express is 404 recipes (101 for each season) that are simple and tasty. Each recipe is written in a short paragraph format. They are great for "throw everything together" cooks, as they say things like "toss in a handful of raisins" or "add a splash of olive oil". You don't have to be worried about exact measurements or dirtying every measuring cup in your drawer. I've only tried 10-15 of the recipes so far, but they have all been easy and flavorful. Some of them sound a little more adventurous than others, but there is something for every taste. My favorite recipes are some of the international dishes (tandoori, tagines). Bittman makes them seem much less intimidating than some other chefs. He also includes menus for each season and there are desserts as well as main dishes.
Whether you're a seasoned (no pun intended) vet in the kitchen or a bit of a newbie, Kitchen Express will help you expand your repertoire with little effort. And, because Bittman is a big proponent of fresh, local, real food the recipes fit in perfectly with the diet and lifestyle I'm trying to cultivate.
**The legal stuff: I am not being compensated in any way for this review. I bought the product and have enjoyed it so I thought I'd share.**
**The legal stuff: I am not being compensated in any way for this review. I bought the product and have enjoyed it so I thought I'd share.**
March 10, 2011
Candied Orange Peels
You may recall that I bought a bunch of oranges. A whole bunch. I mean, a lot. So, what to do with some of them? Candy their peels of course! The peels keep for several months in the freezer and can be eaten alone, dipped in chocolate or in any number of recipes. Here's how I did it.

3) Cover the peels with cold water and bring to a boil.
4) Drain and repeat two more times.
5) Bring 3 cups of sugar and 3 cups of liquid to a boil. (I used the juice from the peeled oranges and made up the difference with water.
6) Once the syrup reaches soft ball stage (~220 deg F) add the peels.
7) Reduce heat and let simmer until the peels are translucent.
8) Remove peels to wax or parchment paper-covered baking sheet. (If you desire, roll the peels in sugar when you remove them from the syrup. This will help prevent them from sticking together.)
9) Let cool completely.
10) Store in airtight container.
These are great combination of the sweetness of the sugar and the slight bitterness of the rind. I plan on dipping some in chocolate eventually. Yum! I also have a recipe for cookies that use these that I hope to try. I'll post that when I get it accomplished.
If you're really feeling sassy, keep boiling the leftover syrup to the hard crack stage and make rock candy. Just don't let it burn. Which I did. It was not tasty...

1) Peel 4-6 small/medium oranges.
2) Cut the peels into 1/4 inch strips.3) Cover the peels with cold water and bring to a boil.
4) Drain and repeat two more times.
5) Bring 3 cups of sugar and 3 cups of liquid to a boil. (I used the juice from the peeled oranges and made up the difference with water.
6) Once the syrup reaches soft ball stage (~220 deg F) add the peels.
7) Reduce heat and let simmer until the peels are translucent.
8) Remove peels to wax or parchment paper-covered baking sheet. (If you desire, roll the peels in sugar when you remove them from the syrup. This will help prevent them from sticking together.)
9) Let cool completely.
10) Store in airtight container.
These are great combination of the sweetness of the sugar and the slight bitterness of the rind. I plan on dipping some in chocolate eventually. Yum! I also have a recipe for cookies that use these that I hope to try. I'll post that when I get it accomplished.
If you're really feeling sassy, keep boiling the leftover syrup to the hard crack stage and make rock candy. Just don't let it burn. Which I did. It was not tasty...
March 9, 2011
Baby Food from Scratch
Baby food has to be the easiest thing in the world to make at home. In the earliest days of solid food all you need is a veggie (or fruit) and a bit of liquid. As your baby gets a little older you can start adding spices and making combinations. My philosophy is that kids should be exposed to fresh, healthy food right from the beginning. The tastier it is, the more likely they are to eat it. American children are just about the only ones in the world that are started on super-bland food which sometimes resembles wallpaper paste (seriously, leave that rice cereal in the bowl for a few minutes). In other nations, the kids are eating mooshed up versions of what the adults are eating. So, I'm not squeamish about adding some flavor to my baby's food (being aware of potential allergens, of course).
Right now, we're still in the earlier stages. The recipes are simple. Blanch or steam a veggie or fruit until it's slightly soft. Put it in the food processor. Puree until smooth. Freeze in small portions. I use a silicon ice cube tray for freezing. Things pop out of it like a dream and the cubes will make later food-mixing super easy. I also use a food mill instead of a processor. It's easier to clean, is great for small batches and leaves a little more texture than a processor. The pictures are of a batch of peas I fixed up yesterday.


As my little guy gets older, I'll start using stock to cook the food instead of water. I'll also add appropriate spices and maybe even a smidge of butter. I don't ever add sweeteners to anything, but keep in mind that kids under two should never, ever eat honey. They could end up with botulism, which can be fatal in infants.
Not sure you want to jump in to homemade baby food? No problem! Some of baby's favorites don't involve any cooking at all. Smash a ripe banana or avocado with a fork. Buy some natural, unsweetened applesauce (the large jar is a much better deal than a baby food size jar). The earlier baby is exposed to real food (that tastes good) the more often he'll choose it later.
March 8, 2011
Experimentation
I'm a scientist, I can't help playing around with things. I also made my husband stop at one of those cheesy fruit stands that are set up at every gas station in Florida so that I could bring home some fresh Florida oranges. (Hey, what's a northern locavore to do?) So, I decided to try out the lemon preservation method from last month on oranges. I did exactly the same thing with oranges that I did with the lemons. I figured that since they're both citrus, things should go about the same. I'll keep you updated with the results, but I figure that the chicken recipe would be just as yummy with oranges in place of lemons.


March 7, 2011
Product Review: Oxo Cherry/Olive Pitter

Did you know that Michigan is one of the world's top cherry producers? Lucky us! I can remember my grandma, aunt and mom using hairpins to pit bazillions of cherries back when I was a wee girl. That was a nice, simple method. It was also messy and time consuming. Now, normally I'm not a gadget girl. The exception would be kitchen gadgets. I picked this one up earlier this winter while I was dreaming of cherry season. I used it to pit the olives when I made the chicken tagine a while back. It's easy to use and relatively neat. It only does one at a time, so it will still take some time, but I really think it will make prepping cherries much easier.

As I look out onto the frigid landscape of March in Michigan, I can't help planning my cherry projects for the year. This little gadget will come in handy as I attempt homemade maraschino cherries (both alcoholic and non-alcoholic), cherry jam and cherry pie filling. Yum!
**The legal stuff: I am not being compensated in any way for this review. I bought the product and have enjoyed it so I thought I'd share.**
March 6, 2011

March 5, 2011
It's Maple Sugaring Season!
This was originally posted on my Yes Michigan blog, but since it's that season again, I thought I'd repost it.
Did you know that Michigan is very active in the Maple Sugar industry? Michigan is one of few places in the world that has native maples suitable for sugaring!
This is the time of year to see some sugaring demonstrations. Freezing nights and above freezing days cause the sap to run. On a good day, from a large tree, you might get a gallon of sap. It takes forty gallons of sap to boil down to 1 gallon of syrup!
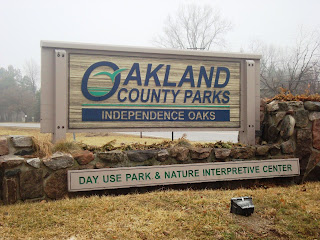
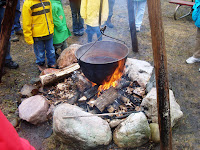
 Parks all over Michigan are doing maple sugar demos in the next couple of weeks. My family headed over to Independence Oaks in Clarkston for Maple Magic last weekend (actually in the spring of 2009). Using a puppet show to interest the kids, we learned the basics of tapping a tree, collecting the sap and boiling it down to syrup. With crafts and samples of foods made from maple syrup the program kept everyone happy!
 After the inside portion, we headed outside to tap a tree and see a kettle of sap boiling over an open fire. The presenters did a great job and the program was enjoyed by everyone!
 The park itself looked like it had a lot to do. We passed trails, play equipment and picnic tables. The Lewis Wint Nature Center has both stuffed and live animals to check out. The entrance fee into the park is $7 for a day, so if it hadn't been raining we would have spent a lot longer. The program was an additional $2 a person. If the weather had been nicer, we could've packed a lunch and had a great day out for $13. Definitely budget friendly!
Check out the Maple Syrup Association website for more information about sugaring and check out possible demos in your area!

Did you know that Michigan is very active in the Maple Sugar industry? Michigan is one of few places in the world that has native maples suitable for sugaring!
This is the time of year to see some sugaring demonstrations. Freezing nights and above freezing days cause the sap to run. On a good day, from a large tree, you might get a gallon of sap. It takes forty gallons of sap to boil down to 1 gallon of syrup!
 Parks all over Michigan are doing maple sugar demos in the next couple of weeks. My family headed over to Independence Oaks in Clarkston for Maple Magic last weekend (actually in the spring of 2009). Using a puppet show to interest the kids, we learned the basics of tapping a tree, collecting the sap and boiling it down to syrup. With crafts and samples of foods made from maple syrup the program kept everyone happy!
  After the inside portion, we headed outside to tap a tree and see a kettle of sap boiling over an open fire. The presenters did a great job and the program was enjoyed by everyone!
  The park itself looked like it had a lot to do. We passed trails, play equipment and picnic tables. The Lewis Wint Nature Center has both stuffed and live animals to check out. The entrance fee into the park is $7 for a day, so if it hadn't been raining we would have spent a lot longer. The program was an additional $2 a person. If the weather had been nicer, we could've packed a lunch and had a great day out for $13. Definitely budget friendly!
Check out the Maple Syrup Association website for more information about sugaring and check out possible demos in your area!
March 4, 2011
Vacation Round Up: Final Thoughts
We did a lot of fun stuff on our vacation. In addition to what I wrote about, we also went to Downtown Disney (pilgrimage to the Lego Store) and most went to SeaWorld (I stayed home with a sick baby). All in all it was a great trip. I'm happy to be home (and after a week, I'm almost caught up with housework), but I can't wait for our next adventure!
My one piece of advice for adventuring with children is to experience it through them. It's very easy to get frustrated with driving or crowds or a lack of chairs at the pool, but if you stop and watch your kids you'll realize that those are small things. The magic of different experiences doesn't need to disappear just because you're a few years older. Get out there and see the world!
My one piece of advice for adventuring with children is to experience it through them. It's very easy to get frustrated with driving or crowds or a lack of chairs at the pool, but if you stop and watch your kids you'll realize that those are small things. The magic of different experiences doesn't need to disappear just because you're a few years older. Get out there and see the world!
March 3, 2011
Vacation Round Up: Southern Soul BBQ
On the way home from Florida, I was determined to experience some great local food. I'm a fan of "Diners, Drive-ins and Dives" on the Food Network and, as it turns out, there was a restaurant that had been featured about 15 minutes off our main route. So, we headed over a big bridge and a slightly less big causeway to St. Simon's Island, Georgia to visit Southern Soul BBQ.

My husband and I are big BBQ fans. We've eaten various styles all over this fine land and this was some of the best. It's a place that you would probably pass right by if you weren't aware of it. Nestled between a gas station and a Domino's pizza on a traffic circle, it's small and unassuming. However, if you keep your eyes peeled, you'll see the smoker and the pile of wood sitting outside the front door. If you have your window open you'll smell it and if that doesn't draw you in you need to check on your BBQ awareness.
Both my husband and I had pulled pork. Mine was on a sandwich with slaw. There were multiple styles of sauce to choose from and they were all excellent. I had fried okra and it was perfect. My husband ordered a side of fried green beans which were delicious! Both veggies were still fresh and slightly crunchy within their batter and each batter was different; perfectly suited to the vegetable it contained. My four year old had a grilled pimento cheese sandwich. Since that was a departure from his usual cheese, he wasn't quite sure about it, but I had a bite and thought it was yummy.
The atmosphere was friendly and laid back. It felt a little more hippy than most BBQ places. Everyone was great, from the employees to the customers. The cross section of customers was amazing as well. The youngest was my infant son, the oldest was a group of 70+ folks who came in for lunch. There were bikers, yuppies, yankees (that was us), and a gentleman who was staying nearby doing some photography.
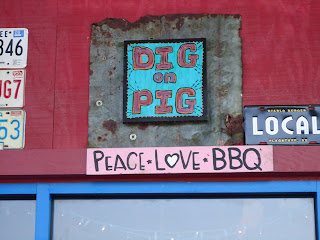
If you're ever in southeastern Georgia, or spending time among our coastal islands, check this place out. And, if you've found a great little local place in your travels, please let me know. I always appreciate advice in my quest to eat locally as often as humanly possible!


The atmosphere was friendly and laid back. It felt a little more hippy than most BBQ places. Everyone was great, from the employees to the customers. The cross section of customers was amazing as well. The youngest was my infant son, the oldest was a group of 70+ folks who came in for lunch. There were bikers, yuppies, yankees (that was us), and a gentleman who was staying nearby doing some photography.
